This tutorial is about making a simple blogging website inASP.NET using C# programming language in visual studio 2013.This beginner level tutorial gives basic idea of blogging application. We’ll not create a MVC application. Our blogging website will be based on web forms and it’ll use Microsoft SQL Server as our backend database.So fire up your Visual Studio. I am using VS 2013 here. Now go to file menu and select New Web site.. option. Give your application a name as shown in figure below. It will create a empty ASP.NET website for you.
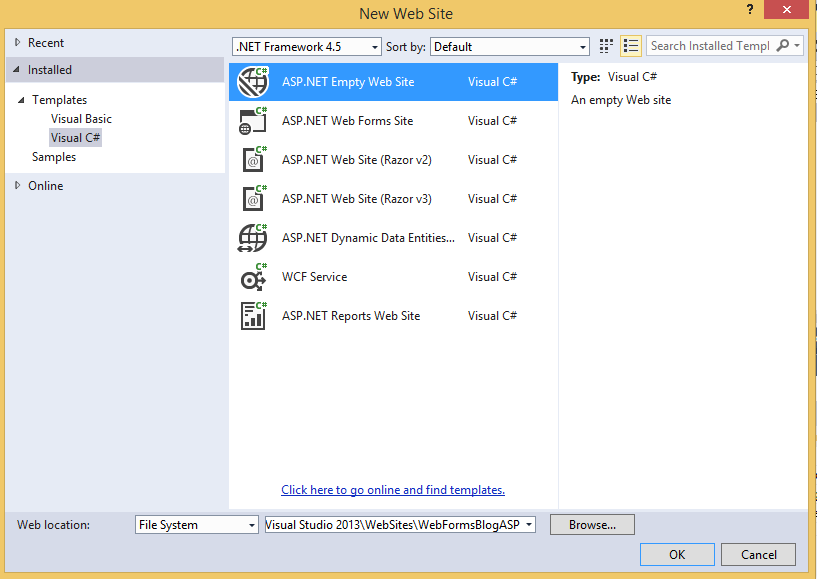 |
| Create an empty website in C# |
Designing database in Visual Studio 2013
First we will prepare our backend database i.e. MS SQL server. Here i will use only some basic columns that any blogging application will need. You can add many more columns as you want according to your blog’s functionality. But keep your database normalized. Go to server explorer pane and right click on data connection link. Click on Create new sql server database. Enter you server name and give any name to your database as shown in figure.
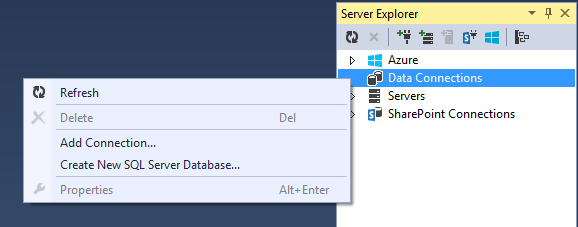 |
| Create a New SQL Server Database using VS 2013 |
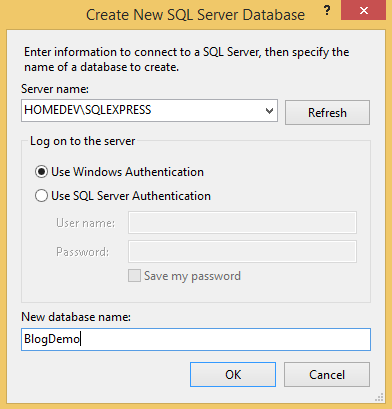 |
| Give your database a good name. |
Now we need to make Tables to store our blog posts. We’ll make two tables to store blog posts and comments on that posts. Clearly we’ll have one -to-many relationship between blog and comments table. So make these tables.
first create a table named BlogPost with columns as shown in figure. Be sure to make Id column primary key and set it’s identity specification true.
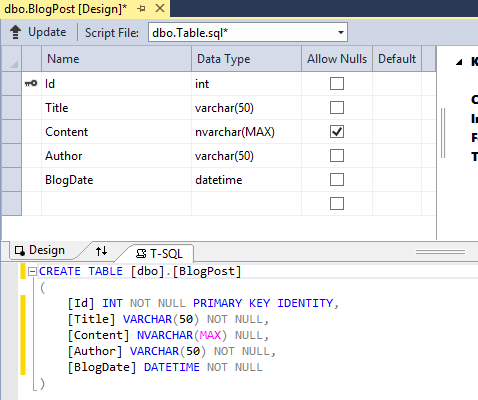 |
| Table BlogPost Design |
 |
| Setting the identity specification of Id column. |
After this click on Update button on upper left corner to save your changes to database. A “Preview Database Updates” box will appear. Click on Update database button. You have successfully created a database table named BlogPost.
Now Create second table named Comments with columns as shown in figure below. In this table we create a column as a foreign key to our BlogPost table. It will represent one to many relationship, means one blog post can have many comments. Make sure you create this foreign key relationship by right clicking on Foreign Keys Link and select “Add New Foreign Key”.
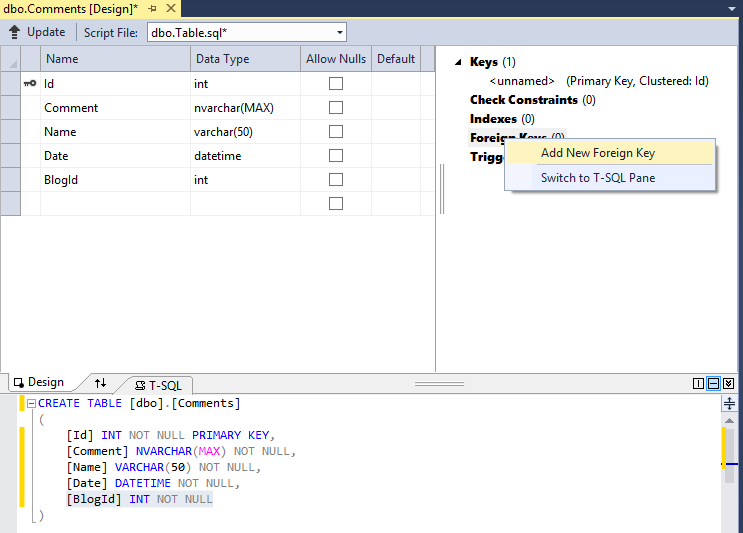 |
| Add a new foreign Key. |
Visual Studio 2013 no more do things automatically for you as in VS 2010. Remember How easy it was to set foreign key in VS 2010. By the way you can use SQL server management studio for setting foreign key. But in VS 2013 you have to do this manually. When you create Foreign key change it’s name to FK_Comments_BlogPost. Now in T-SQL area change the things as shown in image below.
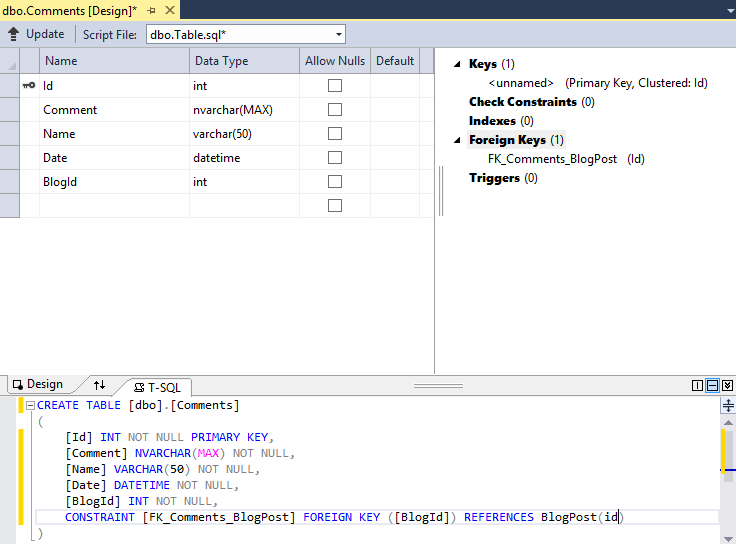 |
| Overall design of table Comments. |
Now our database is prepared. Now we’ll make webforms and write codes to make this simple blogging website start working. Click here for the second part of this tutorial.


If you use ASP.NET Webform site option it’ll autometically add bootstrap in your project. So you don’t have to write all styles. Just make some little tweaks to your css. You should have used that.
Nice Post!
I Love your blog post and I got perfect information about the web form which will help me to create high quality web applications.
Thanks for sharing!